Friday, July 31, 2009

Recycling is Great!


Anyone who has come to my house to stamp knows I don't have a craft room. That's OK. I am always finding ways to make the best use of the space and resources I DO have! This lead me to a great find in my garage loft - an old CD holder that fits ink pads!


This CD holder has been in the loft since we moved here 6 years ago. Running out of space in my canvas storage bins, I wondered it we still had that CD holder, and if it ink pads would fit nicely in it. I cleaned it up, Rick hung it in the laundry closet, and behold - a new ink pad holder!


Now, I have all my ink pads sorted by color family, and the refills next to the pads! I even stuck my ribbon up there. Now, I have lots more space to fill in my canvas storage box. I don't think I'll have any trouble filling it with Stampin' Up! products!


The punch bar is an old towel holder we took out of our half bath when we redecorated it. It fits the larger punches beautifully! I love recycling and reusing (the Girl Scout in me)!


Don't forget your attics and storage spaces! You never know what you'll find that can be reused for a great purpose!

Sunday, July 26, 2009

The Tree is up!


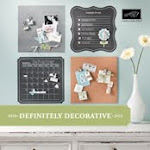
Rick and I got the Thoughts & Prayers tree, and the Henry David Thoreau quote on the wall of our living room! It looks great! It wasn't easy, though. The tree comes in 6 pieces. After talking to my upline, I learned the way I should have done it, and not how I did do it! So, I want to share with you the easiest way to apply your Definitely Decorative products.


First, use your applicator tool (I actually used my Wake County library card) to burnish the Definitely Decorative sheet on the grid paper side. This will make sure the image sticks to the transfer sheet. My directions did NOT say to do that! What I ended up having to do was manually transfer each limb and leaf as I pulled off the grid paper. It would have been much easier to burnish the whole thing first, then peel off the paper!


Next, lay your image on the surface you're transferring it to with the transfer paper out. It's very sticky, so make sure you've got it where you want it, and smooth carefully from one side to the other. I marked spots on the wall lightly with a pencil first, and made sure it would be level before trying to stick the image to the wall. Then, I rubbed the image with my library card, and carefully peeled off the transfer sheet. That part was easy!


Now, we have new decor on our wall that we did ourselves! It's vinyl, and won't come off until we pull it off. You can wipe it with a cloth if you need to, and it will still stay on! If you do peel the image off, it isn't really reusable, because it will stretch and be difficult to reapply.


Contact me if you have any questions about this affordable, easy way to decorate your home!

Friday, July 17, 2009

Tea Bag Holder


I love the 3-dimensional projects you can make from paper, stamps and ink! The possibilities are endless! My club members never do the same project twice! This month, they created a teabag holder. So cute!! Don't drink tea? I bet it fits a Ghiardelli chocolate really well! Here's what I used to create the holder:


Cardstock - base is Rich Razzleberry, inside is Certainly Celery.

Ribbon - Rich Razzleberry, Gold cord

Vintage brads

Stamp set is Fresh Cuts


  1. Cut Rich Razzleberry 3.50 x 7.75 inches, and score at 3.50 inches.


  2. Cut Certainly Celery 6.50 x 7 inches. Line it up on the 6.50 side and score at half an inch, and 3.50 inches. Fold at the 3.50-inch scoreline, and score the folded cardstock at 3.25 and 3.75 inches.


  3. Place Sticky Strip on the half-inch score of the Certainly Celery, and fold the cardstock over to make a sleeve. Punch half circles at either end of the sleeve using the 1 1/4 circle punch. Stamp flower and plant image using Certainly Celery ink on the sleeve.


  4. Pre-fold Rich Razzleberry cardstock at the score lines. Fold the sleeve at the vertical score lines, and adhere the back of the sleeve to the cardstock base using Sticky Strip.


  5. Using a 1/16 hole punch, place 2 holes through the base and sleeve along the "spine." Run a piece of gold cord through the holes, and tie on the outside of the spine.


  6. Run the Rich Razzleberry ribbon underneath the gold cord. You will not need to use any adhesive on the ribbon.


  7. Stamp large image onto Whisper White cardstock, and adhere using SNAIL to a layer of Certainly Celery. Adhere the stamped image to the base using Stampin' Dimensionals on all 4 corners. The Rich Razzleberry ribbon will run underneath. The dimensionals and gold cord will let the ribbon "float" and will prevent it from falling out.


  8. For a finishing touch, I stamped the flower from the set onto Whisper White using Certainly Celery ink, cut it out with Paper Snips, stuck a Vintage Brad through the center, and adhered that to the front with a dimensional.

This is an easy project to create, and makes a unique gift for tea lovers! Try your own color combination. You can also use Designer Series Paper for the inside sleeve. Have fun!

Wednesday, July 8, 2009

Let's Rock and Roll!


I'm featuring the Rock n' Roll technique in one of my cards this month. Club members will make this card in the few days. The stamp set is Simply Said, a very versatile set!
The card base is Barely Banana. I cut a piece of Real Red 4 inches x 5.25 inches. The image is stamped on Brocade Blue, cut 3.75 x 5 inches. I used a white gel pen to color the flower petals, and the eyelet setter on my Crop-a-dile to do the embossing across the bottom. The ribbon is Real Red striped. Love the Ticket Corner punch for the corners!

I've talked about this card before, and wanted to show a different color variation and technique. I inked the two large flowers in Barely Banana, then without stamping off, rolled the edges of the stamp in a circular motion in Real Red. That is the Rock n' Roll technique! I've also used 3 colors on one stamp. Just try to ink from the lightest color to the darkest so you don't contaminate your light-color ink pad.

Enjoy making your own card using this technique, and let's Rock n' Roll!

Thursday, July 2, 2009

Lovin' the new In-Colors!


My new favorite color is Rich Razzleberry. It is one of the new In-Colors featured in the brand new Stampin' Up! catalog. I created a card this week for a meeting of the Chocolate Chip Inkers, using this new color with Crushed Curry (another new In-Color).

First, I stamped the flower image from Fifth Avenue Floral onto Watercolor paper using Black Stayz On. I used the Stayz On so I could color the flower without smearing. I colored one petal at a time for better color control. Using an Aquapainter, I wet a flower petal first, then using Rich Razzleberry re-inker and a blender pen, added color to the petal. I started dark first, then worked out toward a lighter color. You can use the Aquapainter if you need to blend a little more. I used Classic Crushed Curry ink and a blender pen to color the flower stem and pistils. Let the flower dry a little while you work on another part of the card.

The card base is Rich Razzleberry, as is the ribbon. I used Crushed Curry for a layer behind the flower image. I stamped the greeting using Black Classic ink onto the Crushed Curry.

Next, I put a little Two-way Glue on the top of each flower pistil, and applied Dazzling Diamonds glitter. If your flower isn't dry, the glitter will stick everywhere.

Ribbon tip: I cut a piece of ribbon just long enough go around each side of the flower image, then used a separate piece to tie the knot. That makes it easier (in my opinion) to tie the knot exactly where you want it. In this case, I wanted the knot directly over the flower stem.

This is an easy, fun card to create using one of my new favorite stamp sets! Enjoy! Please contact me if you have any questions!

And, don't forget to check out the new catalog! There are tons of great new stamp sets and accessories, as well as some of your old favorites. The new stamp sets and accessories are noted with a small "n" next to them in the catalog. Want your own catalog? Contact me!